
A Room with a View
What happens when your client asks to photograph a sophisticated interior design, where the view from the window is even more outstanding than that?
Since this is a perfect example of a room with a view, I thought that might be interesting to show to my clients and fellow photographers what is my error-proof process in shooting and editing tricky lighting conditions.
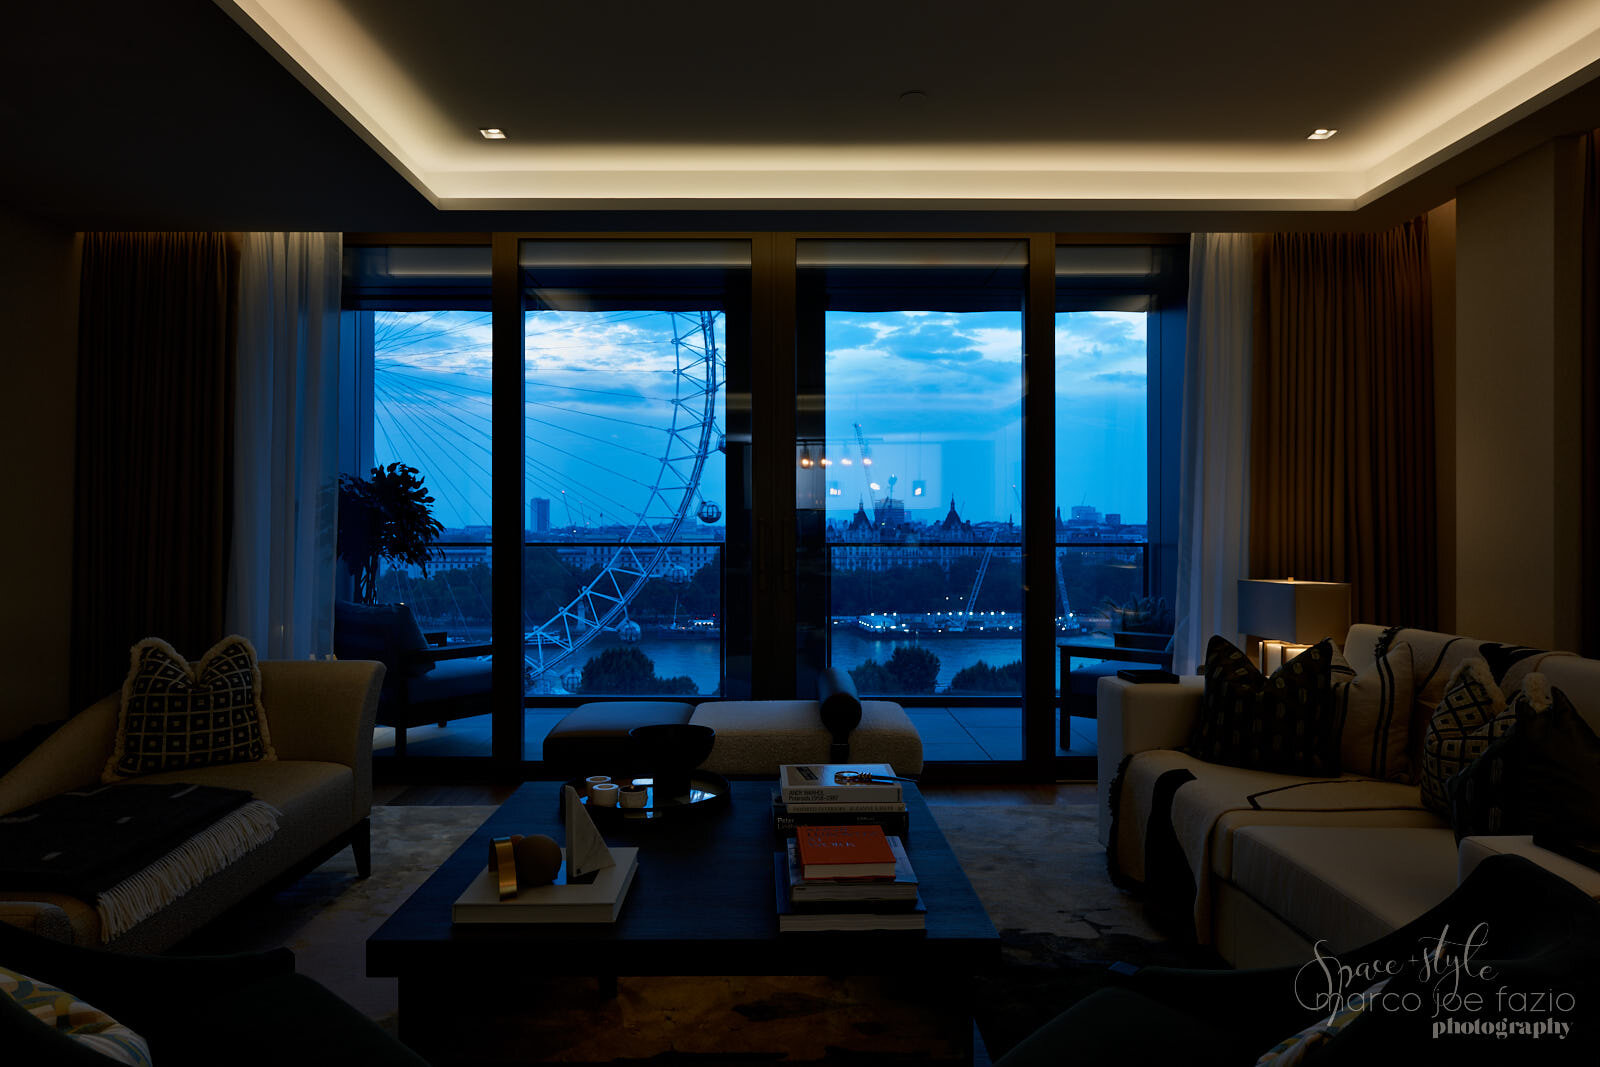
Let’s analyse first the initial image, shoot at best of my camera (Nikon D3x) exposure capabilities.
the best exposure achievable with a single shot
Although the composition of the image, furniture and accessories have been arranged at best, I can see two main issues in lighting:
the outdoor view has an accentuated blue cast. Much more than visible to the human eye;
the perimetrical lighting on the coffered ceiling is so intense that every detail of the surrounded area is burned out… and this is occurring despite the Nikon DX3 has a wide dynamic range.
Here is in four steps, on the shoot and in postproduction, my recipe for solving issues like these at best.
On shoot
The essential equipment I use:
• Nikon D3X (24 megapixels, 13.7 Evs)
• various Nikon lenses (including tilt-shift) with focal length from 14 mm to 85 mm.
• Manfrotto tripod with a geared head
• Apple iPad to check the images while capturing them, wirelessly connected to the camera
• Sekonic L-758DR light meter
• Grey card
step #1 - median exposure shot
Once happy with the composition and layout of the interiors, I take readings with a light meter on various places in the room, calculate the median average, set the camera on that value and take the first shot.
n.b.: Remember to have the camera position fixed on a tripod and use a grey card to set the correct white balance for each different lighting temperature in the scene.

median exposure and grey card reference shot
step #2 - exposure bracketing
I take several shots with increased and decreased exposure (bracketing with different shutter speeds, same aperture) above and below the median exposure. How many? It depends on the difference of lighting between highlights and shadows in the overall scene. Usually, for a picture including interiors and exteriors, I take between 5 and 7 different exposures.

On postproduction
My essential workstation:
• Apple MacPro with calibrated screen
• Wacom Intuos and Cintiq Pro digital tablets
• Capture One, Photoshop and Affinity Photo software
step #3 - photo development
Once all the photos taken are imported in Capture One, I choose the optimal shot to start with; usually, but not necessarily, is the median one.
Initially, I focus on the interiors only, not on the outdoor view. The main adjustments in developing the images are white balance (hence the importance of having the grey card reference), clarity, exposure and level correction.
To adjust the extreme highlights (as in the coffered ceiling on this image), I rely on the wide dynamic range of my camera and on the HDR tool on Capture One. When that is not enough, I need to pick more shots from the bracketed ones and composite the image using masks in Photoshop or Affinity Photo.
recovering the highlights is vital in interiors
step #4 - blending different colour temperatures
Different lighting sources in the scene (i.e. halogen, LED, sun) has different colour temperatures.
This means that adjusting the overall white balance setting on the camera or in postproduction may show the colours correctly in one area, while they are totally offset in another.
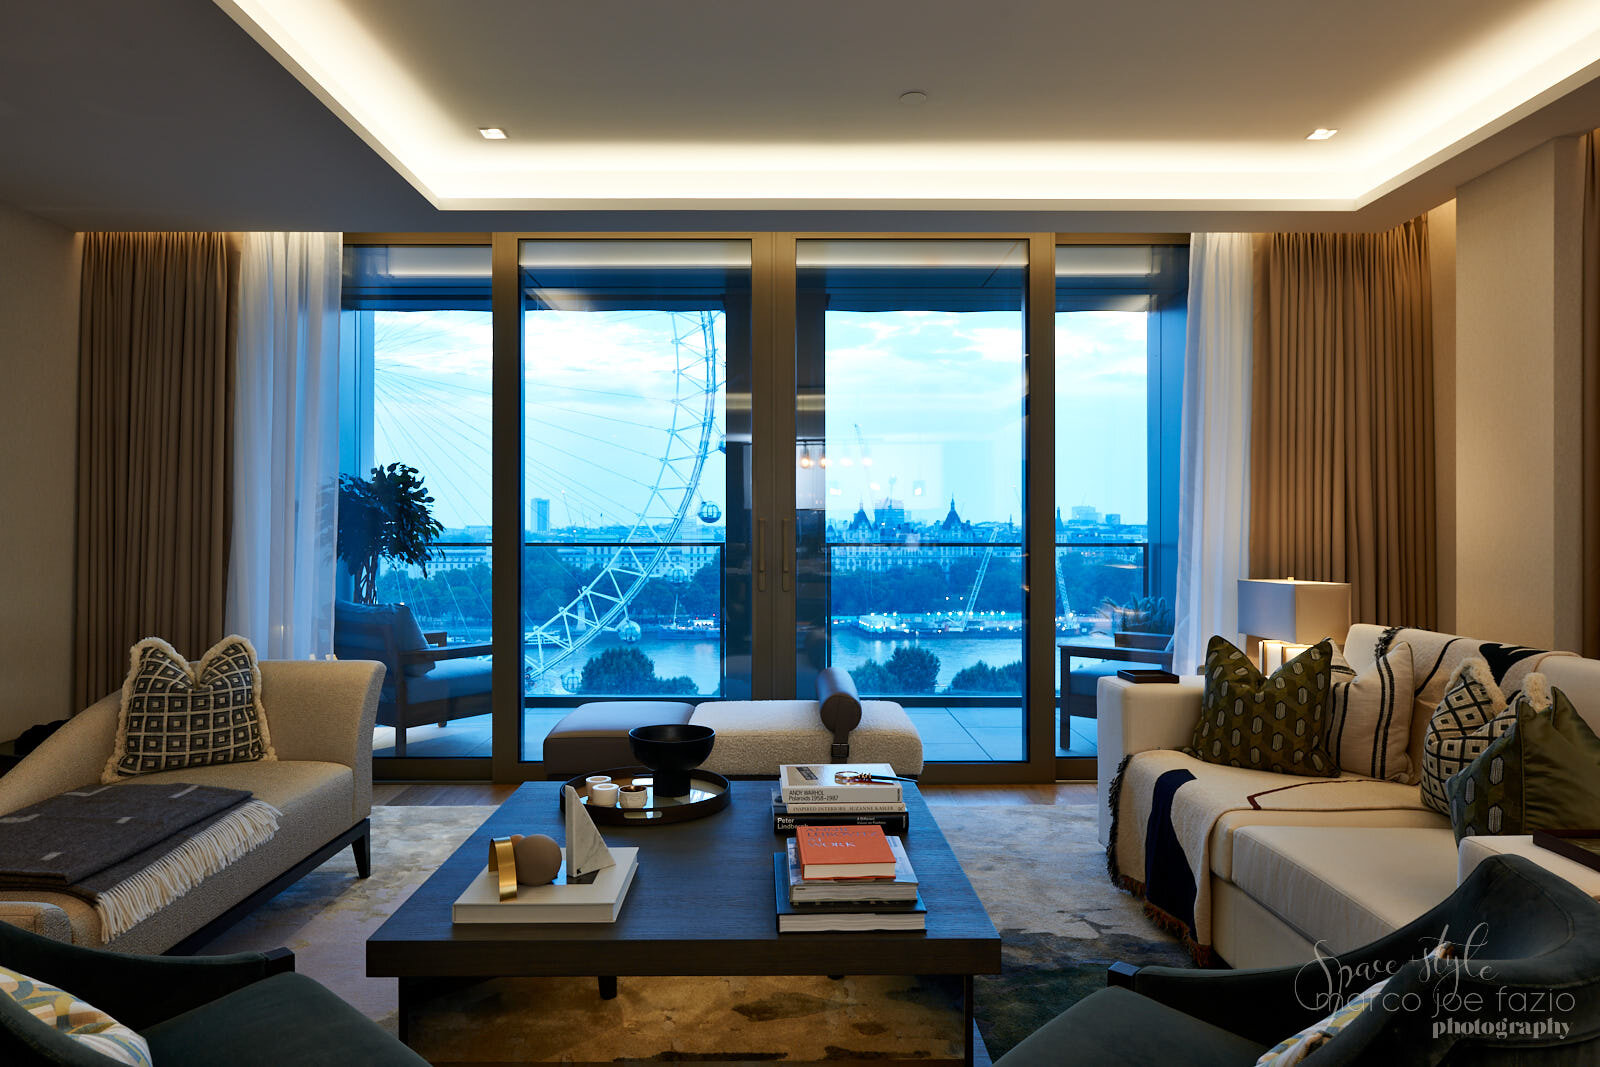
You can see how, in the following images, the indoors are colour corrected, while the outdoors appear all blue. Viceversa, if the outdoors are balanced right, the interiors may appear cast by a yellow-orange hue.
To correct the colour temperature, I take two different shots of the same view and adjust their white balance (WB) differently, one for indoor and one for outdoor lighting.
WB set for optimal interiors colour
These two frames need to be composited as well, with a laborious process of contouring and masking in Photoshop or Affinity Photo.
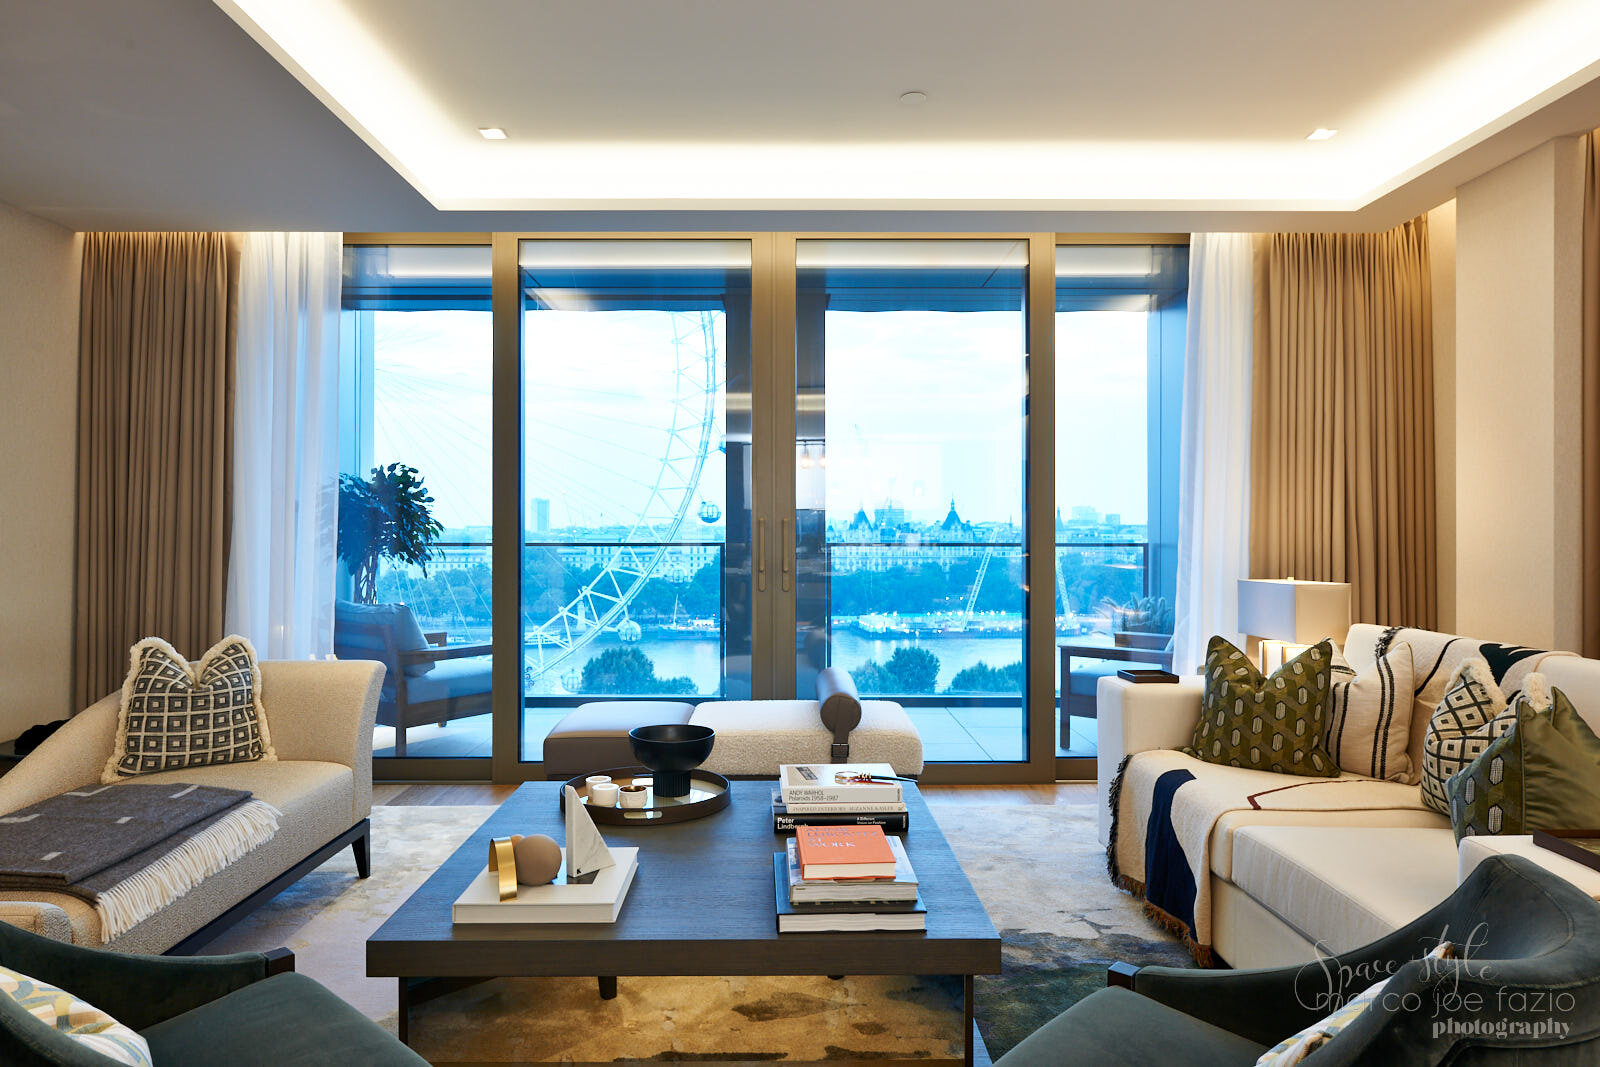
WB raised to correct the outdoor colours
contouring and masking in postproduction
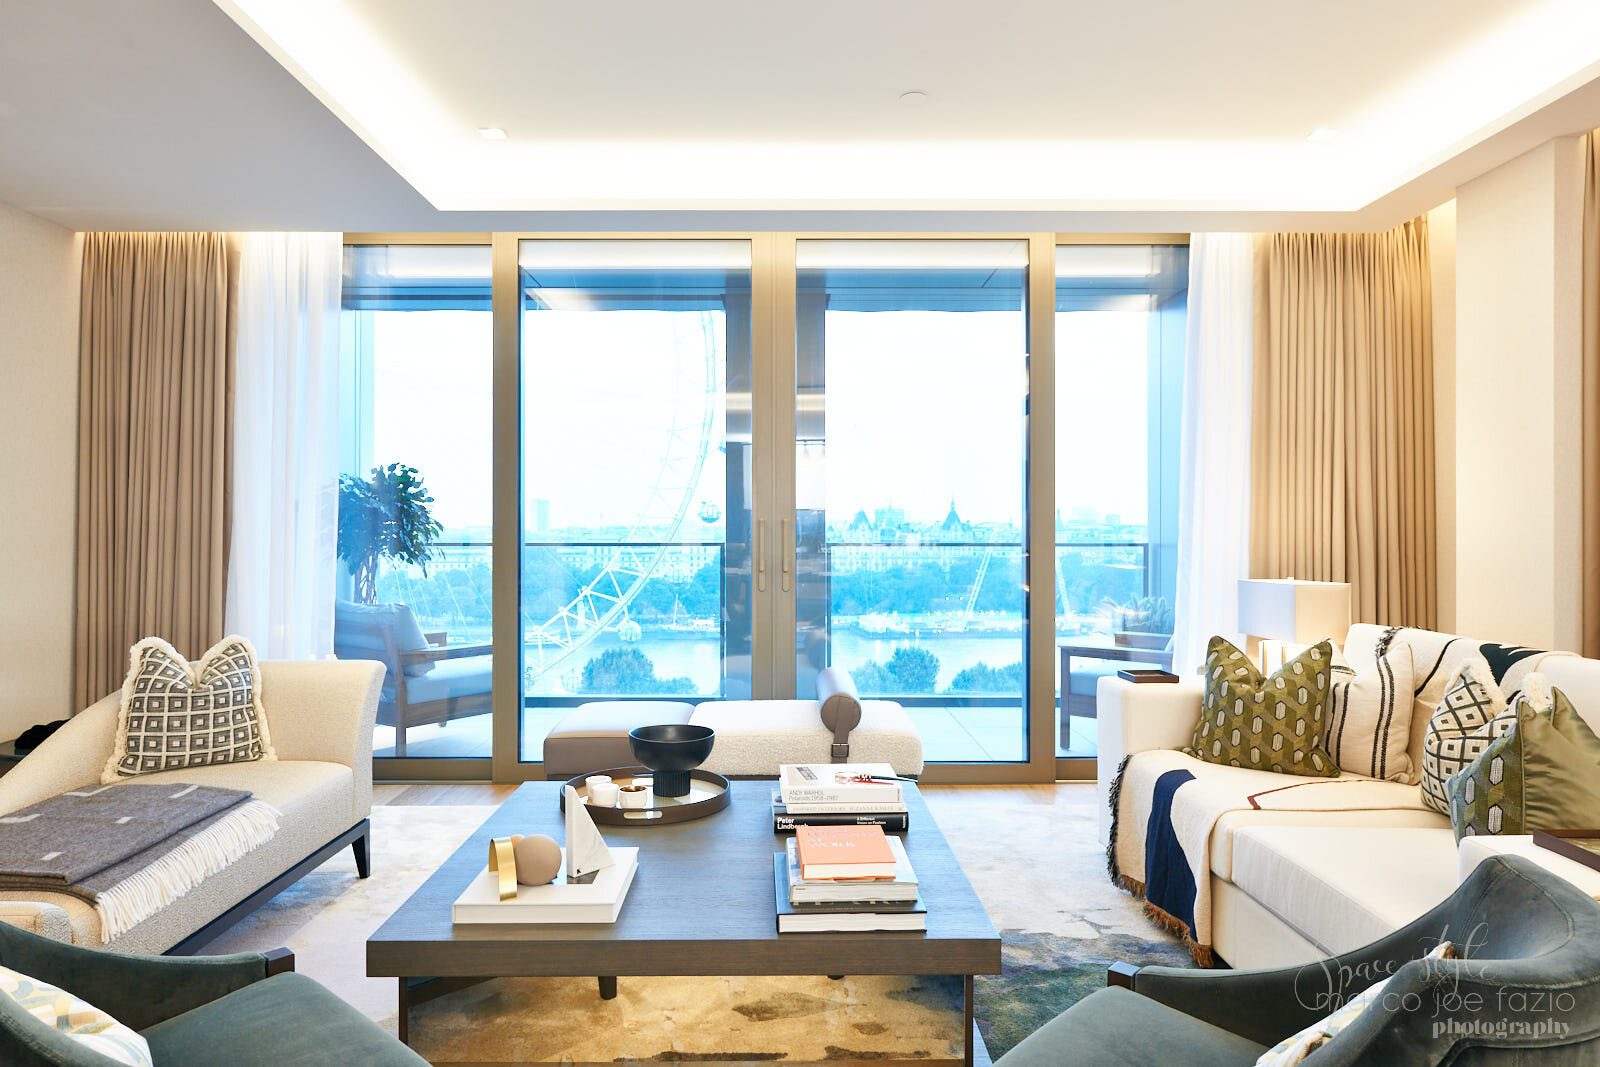
The final image, also retouched by undesired elements like wires, dust or wall cracks if necessary, should then look like this one:
the final retouched image
n.b.: Although it is not strictly part of this topic, please remember always to check your perspective, correcting any falling vertical lines (making them parallel) and horizon for central perspective views.
And if this process is not enough to get a correct lighting balance, then we need to introduce additional lighting sources, using studio strobes or constant lighting… but this opens a new and much more complex ballpark. I will explain it in the next articles, then stay tuned.
A note about the project and the client
The shot explained above is part of an interiors shoot produced a few months ago for Detail Lighting.
The location is Belvedere Gardens, a high profile building of outstanding architectural merit in London’s South.
A project by GRID Architects, the unique design of this building ensures that it is a landmark in its own right; the visually striking exterior complemented by incomparable views from within. An overwhelming sense of luxury flows through the apartments, arranged across the 10 and 20 storey elements of the building providing 1, 2 and 3 bedroom residences culminating in spectacular penthouses at the very top levels.
Founded in 2000, Detail Lighting specialises in the design and supply of LED lighting. The company is 100% driven by the needs of each project, deploying their experience in technical areas of colour temperature, intensity, colour rendering and positioning of light sources.